Creating Your Own Plans
After you develop into a more seasoned woodworker, you might want to try your hand at creating your own plans. Start with the end in mind. Think about what you want the finished project to look like. If you have any drawing skills, make a sketch of the picture you have in your head. Don’t worry if it doesn’t look great. (Only you will see it!) At first, don’t be too detailed or technical. Just get a basic drawing down on paper. Later, you’ll add dimensions and detail. Now, decide what you want the overall size of your project to be: front to back, top to bottom, and side to side.
Imagine what materials you’d like to use to construct the project. Do you want to use nicer wood for certain portions that show, while using less expensive wood for areas that don’t? What other materials would you like to use, like adding a glass panel, for example? About how much of each type of material would you need? (Again, not too detailed yet.) What types of fasteners, handles, shelf pegs, or other hardware would you like to use? If your project involves moldings, will you buy them ready-made or shape them yourself? Make notes to yourself about each of these things. Take a few minutes to brain-storm and just jot down any other items, ideas, or details that comes to mind.
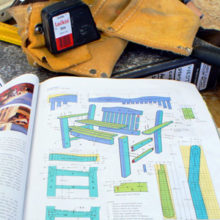
Now, start with a fresh piece of paper and start to make a more detailed drawing, which you’ll add dimensions to later. Figure out what scale you want to use, like 1 foot = 1 inch, for example. (Make sure it will fit on the paper, using that scale!) Now, start with the longest straight line in your project and draw that line first. For example, if your finished project is 8 feet tall, 4 feet wide, and 2 feet deep, you’ll draw an 8 inch line (using the scale above) using a straight edge or ruler. Using a square, protractor, or t-bevel, make lines for additional pieces off of that main piece. Continue this process for the rest of the drawing.
Don’t worry about making a 3D drawing at this point. Start with a front view, then draw a separate side view, and maybe a top view. Also, remember that the actual size of wood is not what is commonly referred to. For example, a 2-by-4 is actually 1.5-by-3.5 inches. (You’ll only make this mistake once.) Just Google “lumber dimensions” if you’re not sure.
Now, start to add measurements (dimensions) to your drawings. Do this for each line in the drawing. Are there any angles that aren’t 90 degrees? If so, mark those. Are there any arcs, circles, etc? Mark the radius of those. If you need to make “zoomed in” drawings of certain details, do that. Add any helpful notes or instructions to the drawings.
Once all of your drawings are done and marked, make photo copies of them so that you can mark up some of the copies. The next step is to create a materials list / cut sheet. Go through your drawings and mark each piece of wood, and write down the dimensions of that piece. Continue this for the entire set of drawings. After you’ve got a list of the pieces you need, is there a good way to cut those pieces from a larger piece of stock? For example, you could cut 4 pieces that are 2 feet by 3 feet from a single 4 foot by 8 foot sheet of wood, which may (or may not) save you money. That means that your materials list would include that large sheet, while the cut list would note that those 4 pieces come from that sheet.
Next, add anything else you need to that materials list, like screws, nails, glue, finishes, hardware, and so on. Estimate how much of each you need, but guess on the high side to avoid making multiple trips to the store in the middle of your project. Also, make a list of what tools you need. Do you have all of those tools? If not, would you borrow, rent, or buy them?
Finally, take your material list to the store with you and write down the price of each of the materials. Add them all together, and that’s your estimated cost for the project. Remember to add tax, if applicable. It’s often a good idea to add a little “oops factor” to the budget, in case you make a mistake either in the planning or the execution of the project.
That’s it! Drawing your own plans, if you can’t find what you need or want to do something custom, will help keep you organized, avoid over/under purchasing materials, and avoid making incorrect cuts. It will also help you think through what you want to accomplish, making adjustments along the way, before settling on a final design. All of these will, in the long run, save you time, money, and frustration, compared to “winging it” without plans.